
If you’re learning, a student, or a content creator, your reel is the first impression people get. Practice reels usually appear messy or disorganized, and that puts you back. Even your good edit may get lost behind messy clips.
A neat reel displays your timing, style, and how nicely you narrate through cuts. Employing CapCut Desktop Video Editor facilitates cleaning up your practice clips. It assists you in removing errors, stabilizing wobbly segments, and integrating everything into a seamless manner.
With this tutorial, you will discover how to transform your raw clips into a clean, solid reel that presents your finest editing work.

Why Clean Practice Reels Matter in a Portfolio
When someone views your editing portfolio, the first few seconds matter most. If your reel looks rough, people may stop watching. Messy intros, poor cuts, or background noise take the focus away from your real talent. Even good editing can get lost if the flow feels off.
A tidy reel indicates your proficiency with timing, pacing, and rhythm. It also indicates that you pay attention to details, something that many clients and editors appreciate. With CapCut PC, you are able to cut clips, stabilize shaky footage, eliminate noise, and achieve smooth transitions. These minor edits go a long way.
If your clips have voice explanations or story components, you can supplement them with voiceovers. With a utility like an AI voice generator, you have clear narration without having to use your own voice. This is also useful when editing in quiet areas or under deadlines.
These products make your clips sharp and sound clean, two essentials that every powerful reel requires. Although CapCut Desktop Video Editor provides you with so many features for free, some of the tools might require payment or a subscription. However, even the free tools will get your editing portfolio to the next level.
When Do You Clean Up Practice Reels?
You should clean up your practice reels before submitting them with job or internship applications. A neat reel assists in demonstrating that you pay attention to the details. If you are enrolled in an online course that asks for a project reel, improving it shows effort and skill.
Using an AI video upscaler can help enhance video quality, making your reel look sharper and more professional. Prior to uploading on sites like YouTube or Behance, organize your clips for a seamless viewing experience.
Additionally, sweep your reel after mastering a new editing technique, such as masking or transitions, to demonstrate improvement.
When combining clips from various projects, ensure they transition smoothly. Applications such as text to speech AI assist in providing voice notes for your reel without the use of a mic. The initial few seconds count, so ensure your work remains clean and powerful right from the beginning.
How to Clean Up Reels with CapCut Desktop Video Editor
Step 1: Download and Install CapCut PC
Visit the official website for CapCut and download the CapCut Desktop Video Editor suitable for your system.
Complete the setup instructions to install the software. When finished, sign up or log in to begin your editing process.

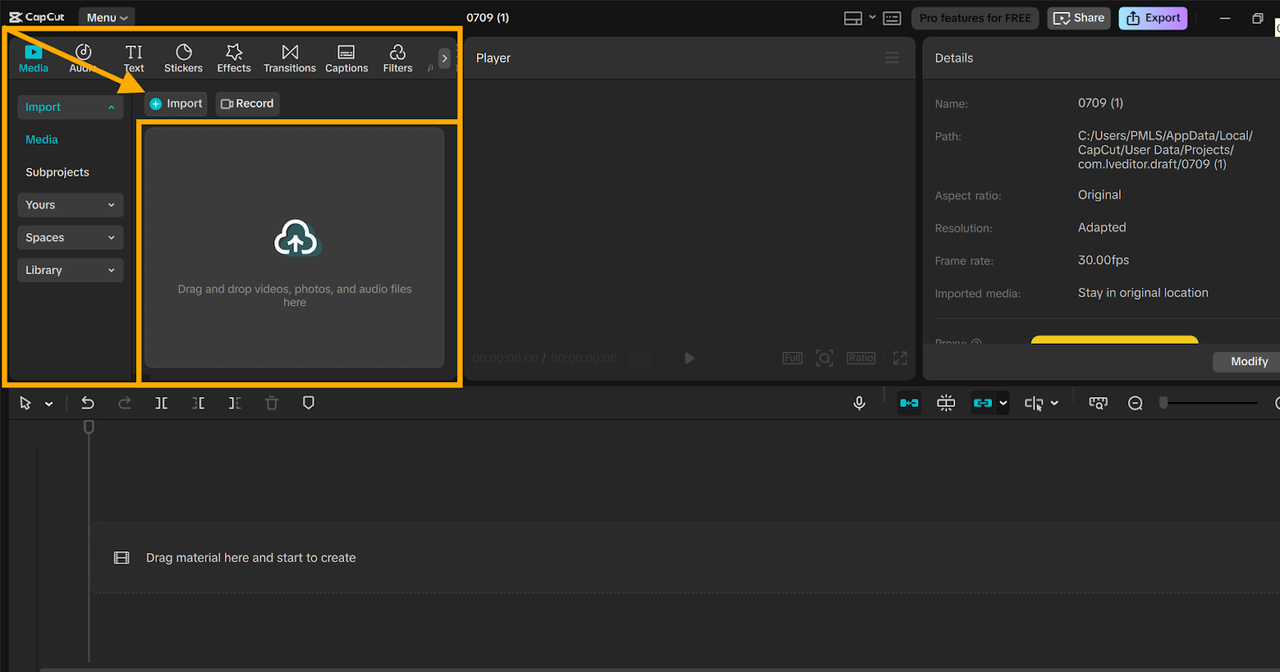
Step 2: Import Your Practice Footage
Open the editor. At the top left, click on “Import” to import your practice clips. Once they have loaded, drag each clip into the timeline along the bottom of the page. Here is where your editing will occur.
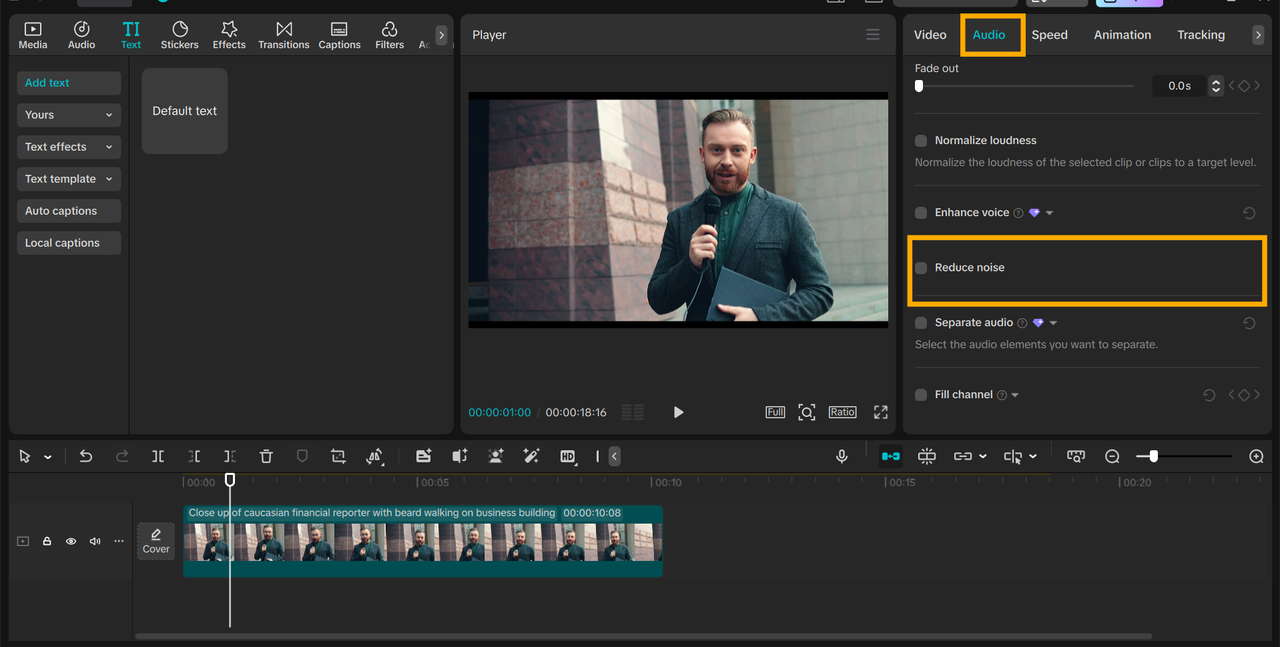
Step 3: Reduce Background Noise
Click on a clip in the timeline. In the right-hand panel, open the “Audio” section. Enable the “Reduce noise” tool to eliminate any unwanted background noise. This makes your clips sound clean and clear.
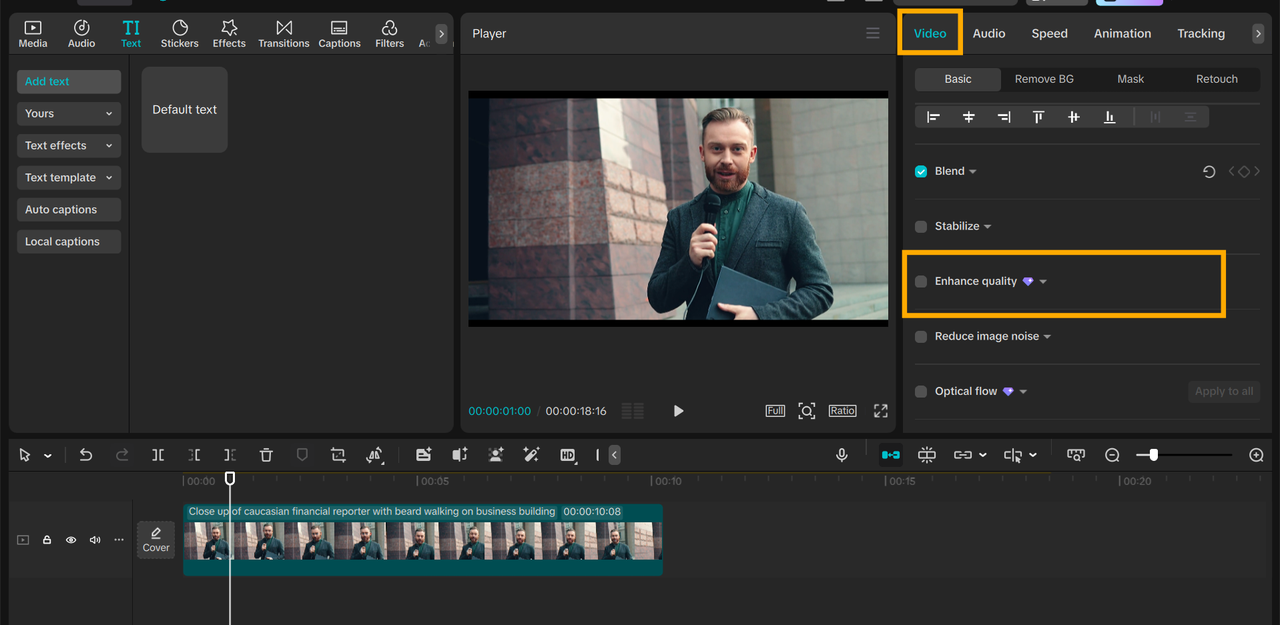
Step 4: Improve Video Quality
With the same selected clip, go to the “Video” tab in the right panel. Press on “Basic” and mark the box beside “Enhance quality” to make the image clearer. You also have the ability to change brightness and contrast to ensure your footage is consistent between clips.
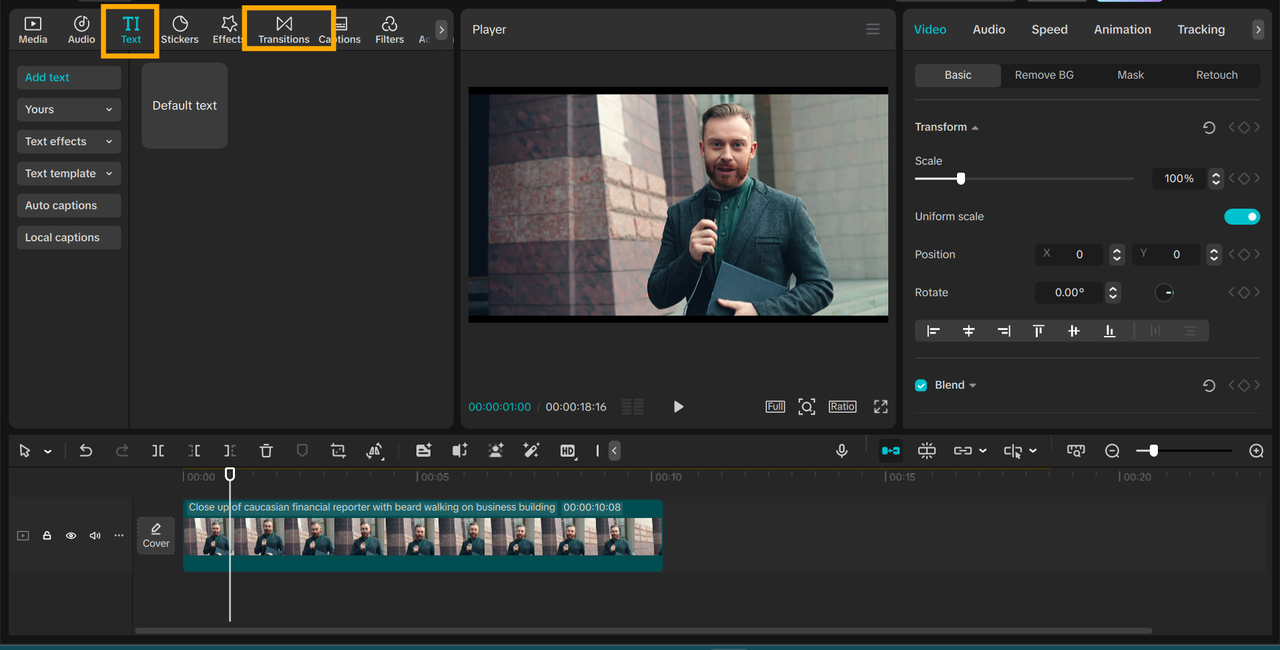
Step 5: Insert Text or Transitions
Press on “Text” on the top menu to insert plain titles, labels, or brief notes to describe each scene. To create smooth transitions between clips, navigate to “Transitions”, select one you prefer, and drag it between the clips on the timeline.
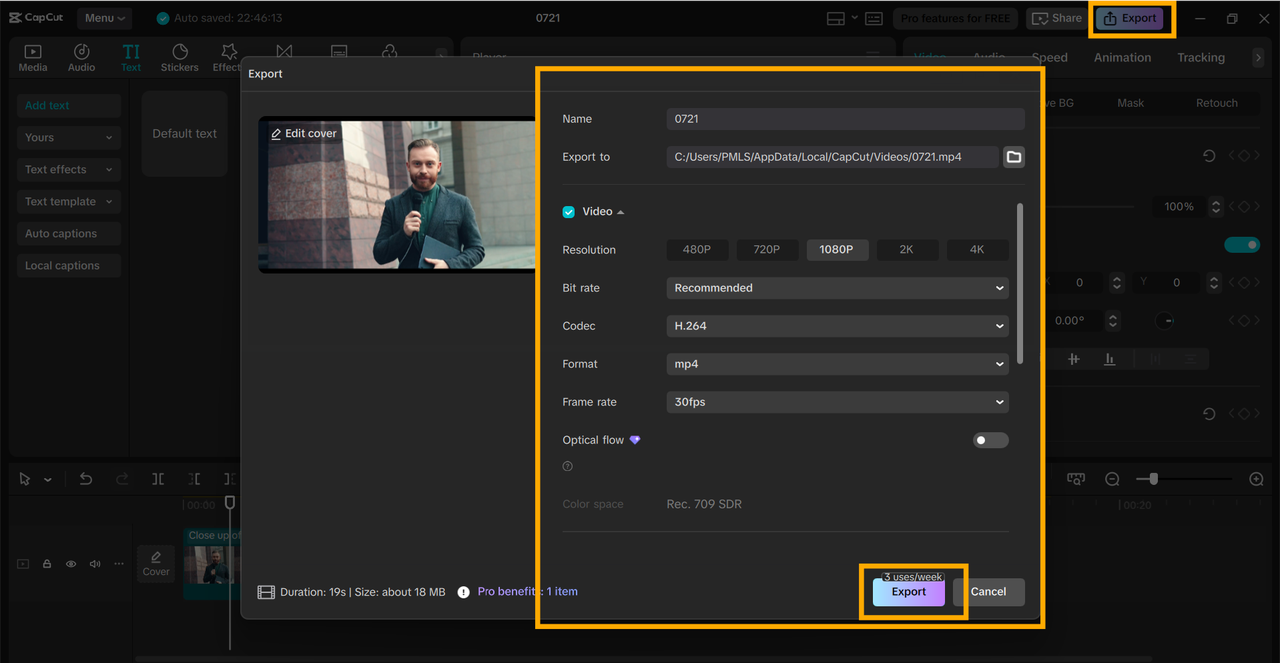
Step 6: Export and Save
When your reel is clean and finalized, click on the “Export” button at the top right corner. Select the resolution and format that suits your requirement. Next, save the final video file onto your device to share or upload.
Conclusion
Messy reel could mask your actual editing ability. Cleaning it up will make your work easy to understand and direct. With CapCut Desktop Video Editor, you can take raw clips and transform them into a clean reel that represents your style and progression.
The majority of the primary features are available for use without cost. Some additional features might require a paid subscription, but the fundamentals are sufficient to create an excellent reel.
Download CapCut PC here on the official website. Begin constructing your best clips today and produce a reel that does justice to your talent.

